
Keel Preparation

This detail shows the 1″ x 1″ Sapele wood keel after gluing. The 5′ glued section is in the background and the split bow section is in the foreground. The bow section will be glued, shaped and screwed to conform to the shape of the hull.
The build manual calls for a solid keel to be split the forward 36″ with a bandsaw, but I do not have one. Otherwise, it would be difficult to bend the keel without steaming and a lot of effort.
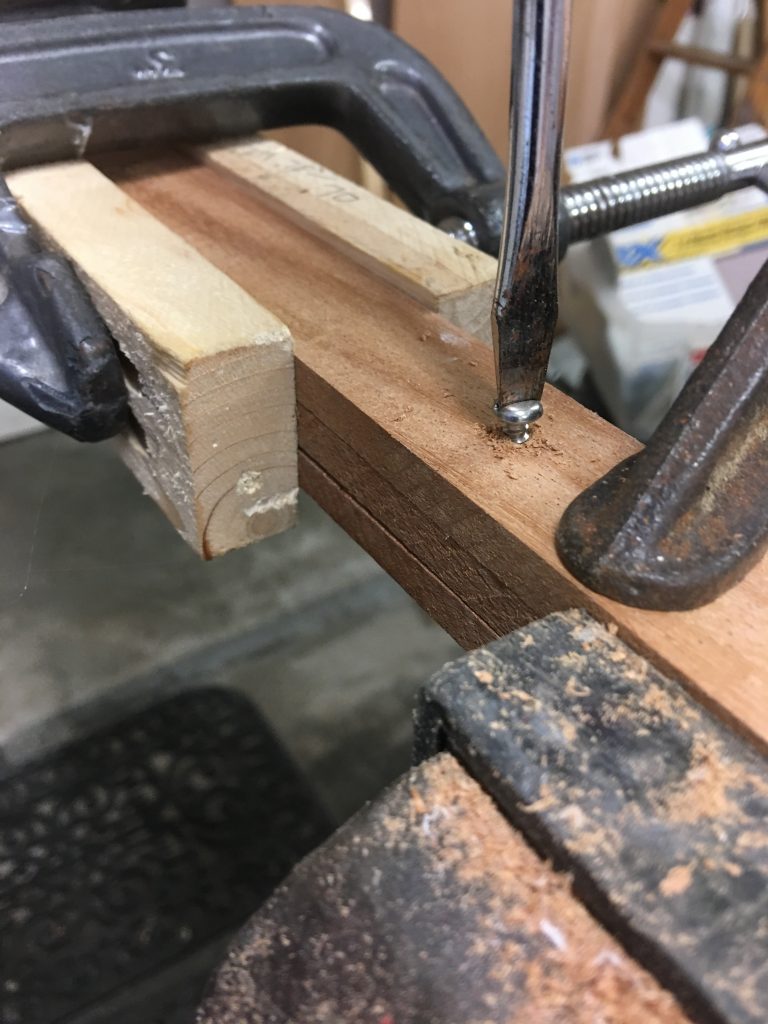
I ripped the wood to 3 pieces, each 1″ x 1/3″. One screw was pre-drilled and placed at the aft end to index the pieces together for alignment after the glue is applied.

I glued 5′ of the strips together using GelMagic Structural Adhesive epoxy and used wax paper to mask the surfaces where the glue ends between the strips. The other 36″ did not have glue applied between the strips, using wax paper to mask the separated portion.

Because the strips the tend so slip after the epoxy is applied, some creative clamping was required to hold and align the pieces. I used clear shipping tape to protect the aluminum and wood blocks from sticking to the epoxy. The glue was applied, the alignment screw placed and the pieces were then clamped.

The aft end design of the keel was modified by the CCWBRA class association in recent years . It was shortened in length to improve the boat handling performance. The keel now ends 12″ forward of the transom and is tapered.
Attaching the Keel

The bottom surface of the boat was block sanded smooth and prepared for gluing.
Clear plastic shipping tape was applied to limit the glue edge distance from the keel which reduced the sanding.
Masking tap marks were applied for center alignment.

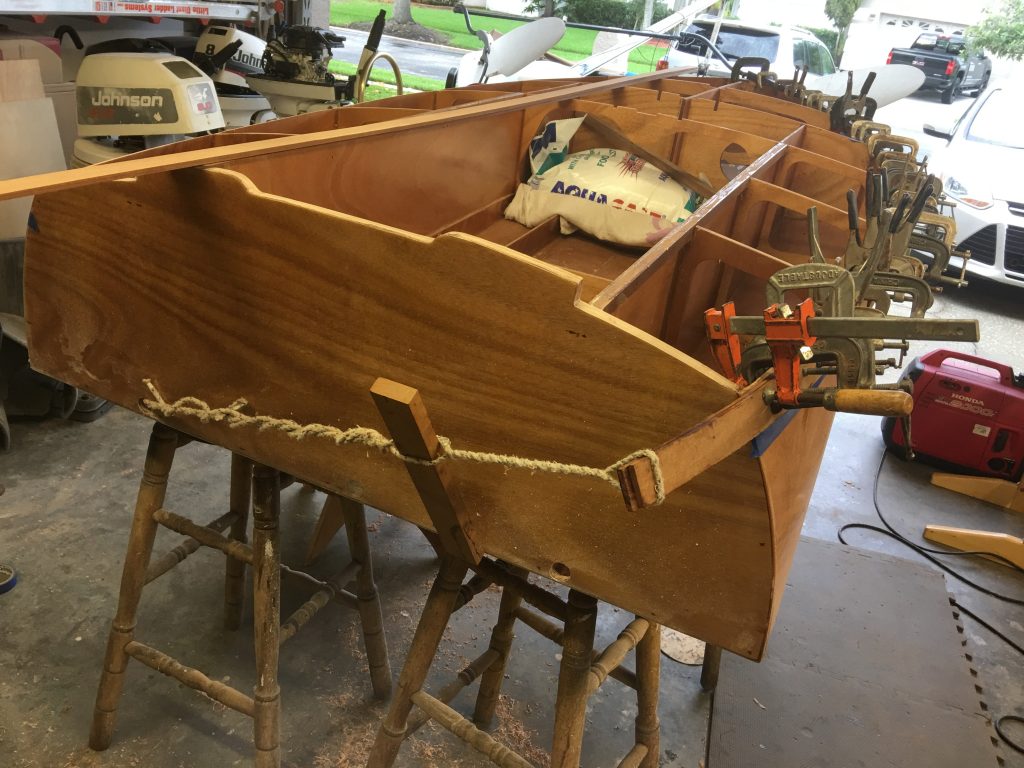
The keel is now glued, screwed and set. It took quite a bit of force to pull the keel into shape, so blocks were placed on the inside of the hull to help hold the temporary screws. It was necessary clamp the keel strips very close to the hull before drilling and screwing them down, working from the stern towards the bow. The hole center of the first strip changes from the one underneath it as each strip is drawn down to the hull.

Sapele wood has an interesting ribbon-like interwoven grain. It is a rather soft wood, so it does tend to splinter when planing or routing. The grain shows some occasional rotation patterns, and I found one such area to have a weakness when bending, causing it to crack slightly. I had no problem repairing the issue with some additional glue and screws.
Finishing the Keel

I trimmed the strip closest to the hull before gluing in order to simplify the shaping at the bow.
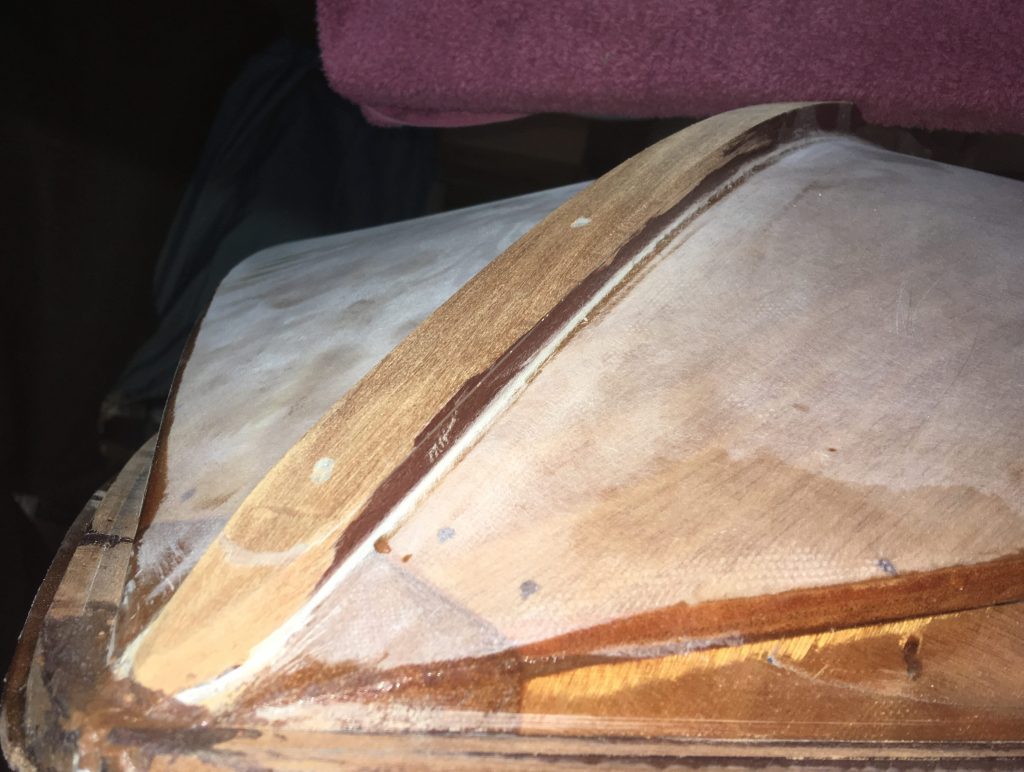
This is what the keel looks like later after trimming and tapering.

With some duct tape to protect the bottom, a lot of heavy sanding brought the keel into shape.

The keel is now looking very fast.

The bottom is looking good for now and we will be doing some serious leveling and additional epoxy later. Getting ready for another flip next.
Toe Railings

We have just glued two 1/4″ strips of Sapele wood to the Port side to form the toe rail. The Chesapeake Light Craft kit ships these rails in shorter pieces and requires joining them with a scarf joint before attaching. This was on of the advantages of sourcing them locally.
Even using most of the c-clamps in the county, I still needed a little pull to make the rear end of the rail pull in enough. Something like 30 clamps.